Introduction
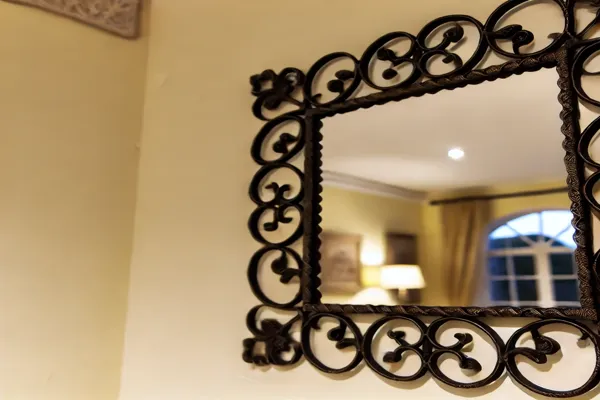
Wrought iron mirrors have long been cherished for their timeless appeal and the unique touch they bring to any space. These mirrors, with their intricate and often handcrafted frames, add a sense of elegance and sophistication that is hard to match with other materials. Whether in a modern apartment or a rustic farmhouse, wrought iron mirrors can seamlessly blend with various interior styles, making them a versatile choice for homeowners and decorators alike.
The beauty of wrought iron lies not just in its aesthetic appeal, but also in its durability. Unlike other materials, wrought iron is incredibly sturdy and can withstand the test of time, ensuring that your mirror remains a striking focal point in your home for years to come. Its ability to be molded into various shapes and designs allows for endless customization, making each wrought iron mirror a unique piece of art.
For those who enjoy hands-on projects, creating your own wrought iron mirror frame offers a rewarding experience. Not only do you get to choose the exact design that fits your space, but you also have the satisfaction of crafting something with your own hands. Whether you’re a seasoned DIY enthusiast or just starting, the process of designing and building a wrought iron mirror frame is both challenging and fulfilling. Plus, it allows for a level of personalization that store-bought mirrors simply cannot provide.
In this guide, we’ll take you through the steps to create your own wrought iron mirror frame, ensuring that you can bring this timeless piece into your home, tailored perfectly to your taste and space.
Understanding Wrought Iron as a Material
Wrought iron has been a favored material for centuries, especially in the realm of decorative arts and functional design. Its unique properties make it an excellent choice for creating items that are both beautiful and durable. One of the key characteristics of wrought iron is its strength. Unlike cast iron, which is more brittle, wrought iron is tough and can be shaped into intricate designs without compromising its structural integrity. This makes it ideal for crafting mirror frames that are not only sturdy but also artistically detailed.
Another important property of wrought iron is its malleability. This material can be heated and worked into various shapes and patterns, allowing for a high degree of customization. Whether you’re looking for a simple, minimalist frame or an ornate, intricate design, wrought iron can be molded to meet your specific needs. Its flexibility also means that it can be combined with other materials, such as wood or glass, to create a truly unique piece.
The aesthetic appeal of wrought iron is another reason it remains a popular choice for decorative elements. Its distinctive, hand-forged appearance gives it a timeless quality that can complement a wide range of interior styles. From traditional to contemporary, wrought iron mirror frames add a touch of elegance and sophistication to any space. The natural, slightly textured surface of wrought iron also contributes to its charm, offering a tactile experience that enhances its visual appeal.
When it comes to mirror frames, the benefits of using wrought iron are numerous. First and foremost is its longevity. Wrought iron is highly resistant to corrosion and wear, making it a durable option that can last for generations. This means that your wrought iron mirror frame will remain a beautiful and functional part of your home for many years, with minimal maintenance required.
Versatility is another significant advantage of wrought iron. Because it can be shaped into virtually any design, it offers endless possibilities for customization. Whether you prefer a sleek, modern look or a more traditional, ornate style, wrought iron can be tailored to fit your vision. This adaptability makes it easy to incorporate a wrought iron mirror frame into any room, regardless of the existing décor.
Finally, the unique look of wrought iron ensures that your mirror will be a standout piece. Each wrought iron frame is one-of-a-kind, with slight variations in texture and finish that add to its character. This individuality, combined with the material’s timeless appeal, makes wrought iron mirror frames a beautiful addition to any home.
Gathering Materials and Tools
Before you begin crafting your wrought iron mirror frame, it’s essential to gather all the necessary materials and tools. Having everything on hand will make the process smoother and ensure that you can focus on the creative aspects of your project.
List Essential Materials
To create a wrought iron mirror frame, you’ll need the following materials:
- Wrought Iron Bars: These will form the structure of your frame. Choose the size and thickness based on the design you have in mind.
- Mirror: Select a mirror that fits the dimensions of the frame you plan to create. You can choose a standard rectangle or explore other shapes like circles or ovals for a unique look.
- Welding Equipment: This includes a welder, welding rods, and flux. Welding will be necessary to join the wrought iron pieces securely.
- Finishing Supplies: These may include paint or a rust-resistant coating to protect the wrought iron, as well as sandpaper or a wire brush for smoothing the edges and surface.
- Mounting Hardware: Depending on how you plan to hang the mirror, you may need brackets, hooks, or a sturdy wire.
Detail the Tools Required
In addition to the materials, you’ll need the following tools to complete the project:
- Welding Machine: Essential for fusing the wrought iron bars together. If you’re not experienced in welding, consider taking a basic course or seeking help from a professional.
- Hammer and Anvil: Useful for shaping the wrought iron into the desired design, especially if you want to add curves or decorative elements.
- Measuring Tape: To ensure that your measurements are accurate, both for cutting the iron bars and positioning the mirror within the frame.
- Angle Grinder: For cutting the wrought iron bars to the correct length and for smoothing rough edges after welding.
- Clamps: These will hold the pieces of wrought iron in place while you work, ensuring precision in your assembly.
- Safety Gear: Protect yourself with safety glasses, welding gloves, and a welding helmet. Working with wrought iron and welding equipment requires careful attention to safety.
Where to Source Wrought Iron
Finding quality wrought iron is crucial to the success of your project. Here are some tips on where to source it:
- Local Metal Suppliers: Check with local metal fabrication shops or suppliers, as they often carry wrought iron bars in various sizes and styles. This also gives you the advantage of seeing the material in person before purchasing.
- Online Retailers: Several online stores specialize in metal supplies, offering a wide selection of wrought iron bars that can be delivered to your door. Websites like Metal Supermarkets or Online Metals are good places to start.
- Salvage Yards and Reclamation Shops: For a more budget-friendly option, consider visiting a salvage yard or a shop that specializes in reclaimed materials. You might find unique wrought iron pieces that can add character to your mirror frame.
By gathering the right materials and tools, and sourcing quality wrought iron, you’ll be well-prepared to start your project and create a beautiful, durable mirror frame that enhances your space.
Designing the Wrought Iron Mirror Frame
Designing your wrought iron mirror frame is where your creativity can truly shine. This step allows you to personalize the mirror to suit your style and the space where it will be displayed. From choosing the overall design to adding decorative elements, this section will guide you through the process of bringing your vision to life.
Choosing a Design That Fits Your Space
The first step in designing your wrought iron mirror frame is deciding on a style that complements your interior. Wrought iron is incredibly versatile, allowing you to create frames that range from sleek and modern to ornate and traditional. Here are some design ideas to consider:
- Classic Style: If your space has a timeless, elegant vibe, consider a classic design with intricate scrollwork and symmetrical patterns. This style is perfect for adding a touch of sophistication to living rooms, dining areas, or entryways.
- Modern Style: For a more contemporary look, opt for clean lines and minimalistic designs. A simple rectangular frame with straight edges and a matte black finish can add a sleek, modern touch to your bathroom or hallway.
- Rustic Style: If your home has a rustic or farmhouse aesthetic, consider a wrought iron frame with a distressed finish. Incorporating elements like hammered textures or rough edges can enhance the cozy, lived-in feel of your space.
When choosing a design, think about how the mirror will interact with other elements in the room, such as furniture, lighting, and color schemes. Your mirror should complement these features, either by blending in harmoniously or standing out as a striking focal point.
Sketching and Planning
Once you’ve decided on a design, it’s time to put your ideas on paper. Creating a rough sketch of your desired frame will help you visualize the final product and ensure that all the elements work together cohesively. Here’s how to get started:
- Measure Your Space: Begin by measuring the area where the mirror will be placed. This will give you an idea of the appropriate size for your frame.
- Draw the Basic Shape: Sketch the outline of your frame, taking into account the shape of your mirror. Whether it’s round, square, or rectangular, the shape of the frame should enhance the mirror’s form.
- Plan for Proportions: Consider the proportions of the frame in relation to the mirror. A wide, ornate frame may look best with a smaller mirror, while a thin, minimalist frame can complement a larger mirror.
Sketching out your design allows you to experiment with different ideas before committing to a final look. It’s also a helpful reference during the construction phase, ensuring that your project stays on track.
Incorporating Decorative Elements
To make your wrought iron mirror frame truly unique, consider adding decorative elements that reflect your personal style. Wrought iron is perfect for incorporating detailed motifs and patterns that can transform a simple frame into a piece of art. Here are some ideas:
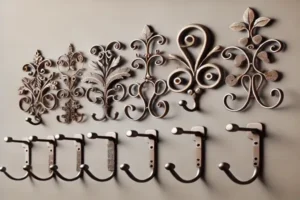
- Scrollwork: Classic scrollwork designs, with their graceful curves and loops, can add an elegant touch to your frame. These elements work well in traditional and vintage-inspired spaces.
- Floral Motifs: For a more romantic or nature-inspired look, consider incorporating floral patterns into your design. Wrought iron can be shaped into delicate flowers, leaves, or vines, adding a soft, organic feel to the frame.
- Geometric Patterns: If you prefer a more modern or abstract aesthetic, geometric shapes and patterns can give your frame a contemporary edge. Triangles, circles, or even intricate lattice designs can create visual interest without overwhelming the space.
By carefully designing and planning your wrought iron mirror frame, you’ll create a piece that not only serves a functional purpose but also enhances the beauty of your home. The possibilities are endless, and with a bit of creativity, you can craft a mirror that is as unique as you are.
Crafting the Wrought Iron Frame
Now that you’ve designed your wrought iron mirror frame, it’s time to bring your creation to life. This section will guide you through the process of cutting, shaping, welding, and finishing the wrought iron to create a sturdy and visually appealing frame.
Cutting and Shaping the Wrought Iron
The first step in crafting your mirror frame is to cut and shape the wrought iron bars according to your design. Follow these step-by-step instructions:
- Measure and Mark: Use a measuring tape to measure the lengths of the wrought iron bars needed for your frame. Mark the cutting points with chalk or a marker, ensuring accuracy.
- Secure the Bars: Place the wrought iron bars securely in a clamp or vice to keep them stable during cutting. This will prevent any movement that could lead to uneven cuts.
- Cut the Bars: Use an angle grinder with a cutting disc to cut the wrought iron bars at the marked points. Wear safety glasses and gloves to protect yourself from sparks and sharp edges. Cut slowly and steadily to ensure clean edges.
- Shape the Iron: If your design includes curves or intricate shapes, use a hammer and anvil to bend and shape the wrought iron. Heat the bars with a torch if necessary to make them more pliable. Work carefully to achieve the desired shapes and angles.
- Smooth the Edges: After cutting and shaping, use a file or the grinder to smooth any rough edges. This will make the pieces easier to weld and give the frame a polished look.
Welding the Frame
Once your wrought iron pieces are cut and shaped, it’s time to assemble them into a frame using welding. Here’s how to do it:
- Arrange the Pieces: Lay out the wrought iron pieces on a flat surface, arranging them according to your design. Double-check the alignment and proportions before welding.
- Tack Weld: Begin by tack welding the corners and joints to hold the pieces in place. Tack welding involves making small, temporary welds at key points to secure the pieces without fully welding them yet.
- Check Alignment: After tack welding, check that all the pieces are aligned correctly. Make any necessary adjustments before proceeding to full welding.
- Full Weld: Once you’re satisfied with the alignment, proceed to fully weld the joints. Move slowly and evenly to create strong, clean welds that will hold the frame together securely. Ensure that each joint is fully welded to prevent any weak spots.
- Cool and Inspect: Allow the welded frame to cool naturally. Once it’s cool, inspect the welds for any gaps or imperfections. If needed, add additional welds or smooth the joints with a grinder.
Finishing Touches
With the frame fully welded, it’s time to add the finishing touches to enhance its appearance and durability:
- Sand the Surface: Use sandpaper or a wire brush to remove any welding residue, rust, or rough spots from the surface of the wrought iron. This will create a smooth base for painting or finishing.
- Apply a Finish: Depending on your desired look, you can leave the wrought iron with its natural finish, or you can paint or seal it for added protection. Consider using a rust-resistant paint or a clear sealant to prevent corrosion and give the frame a polished appearance.
- Final Inspection: Once the finish is applied, inspect the frame one last time to ensure it meets your standards. Check for any missed spots or imperfections that need attention.
By carefully crafting and finishing your wrought iron mirror frame, you’ll create a beautiful and durable piece that will be a standout feature in your home. With attention to detail and a bit of patience, your custom-made frame will be ready to showcase your mirror and enhance any space.
Assembling the Mirror
After crafting the wrought iron frame, the next step is to securely fit the mirror into it. This section will guide you through the process of assembling the mirror, ensuring that it is safely and firmly attached to the frame.
Fitting the Mirror into the Frame
To properly secure the mirror within your wrought iron frame, follow these steps:
- Prepare the Frame: Before fitting the mirror, ensure that the frame is clean and free from any debris. If you applied a finish, make sure it is completely dry.
- Measure and Position the Mirror: Place the mirror on a flat surface and carefully position the wrought iron frame over it. Ensure that the mirror fits snugly within the frame without any gaps. If necessary, use rubber spacers or padding to prevent the mirror from making direct contact with the iron, which could lead to breakage.
- Secure with Adhesive: One way to attach the mirror to the frame is by using a strong adhesive specifically designed for glass and metal. Apply the adhesive along the edges of the mirror or the inside edges of the frame where the mirror will sit. Carefully press the mirror into place, ensuring it is evenly aligned within the frame. Allow the adhesive to cure according to the manufacturer’s instructions before moving the mirror.
- Use Brackets for Extra Support: For added security, especially with larger or heavier mirrors, consider using brackets or clips to hold the mirror in place. Attach the brackets to the back of the wrought iron frame using screws, ensuring they are tightly secured. Gently slide the mirror into position, allowing the brackets to support its weight. Tighten the screws as needed to keep the mirror firmly in place.
- Check Stability: After securing the mirror, gently lift the frame to check that the mirror is stable and does not shift. If you notice any movement, adjust the adhesive or brackets as necessary to ensure a tight fit.
Safety Considerations
Handling glass and heavy wrought iron requires careful attention to safety. Here are some important considerations:
- Wear Protective Gear: When working with glass, always wear protective gloves to prevent cuts and safety glasses to shield your eyes from any shards. Additionally, use gloves when handling the wrought iron to protect your hands from sharp edges.
- Work on a Stable Surface: Assemble the mirror on a flat, stable surface to prevent it from tipping over or sliding during the process. Ensure that the surface is large enough to accommodate both the mirror and the frame comfortably.
- Lift with Care: Mirrors, especially large ones, can be heavy and fragile. When lifting or moving the mirror and frame, use both hands and lift with your legs to avoid straining your back. If the mirror is particularly large, consider asking for help to safely maneuver it into place.
- Avoid Excess Pressure: When fitting the mirror into the frame, avoid applying excessive pressure, as this could cause the glass to crack or shatter. Work slowly and carefully to ensure a secure fit without damaging the mirror.
By following these steps and prioritizing safety, you’ll be able to successfully assemble your wrought iron mirror, resulting in a beautiful, functional piece that will enhance your home.
Displaying Your Wrought Iron Mirror
After successfully crafting and assembling your wrought iron mirror, the final step is to display it in a way that enhances its beauty and impact within your home. This section will guide you on choosing the right location and securely mounting the mirror to ensure it becomes a striking focal point in any room.
Choosing the Right Location
Selecting the perfect spot for your wrought iron mirror is essential to maximize its aesthetic appeal. Consider the following locations for optimal impact:
- Entryways: Placing a wrought iron mirror in the entryway creates an inviting atmosphere as soon as guests enter your home. It reflects light and space, making the area feel larger and more welcoming. A well-placed mirror here also allows for a quick glance before heading out the door.
- Living Rooms: In the living room, a wrought iron mirror can serve as a stunning focal point above a fireplace, sofa, or console table. It not only adds elegance but also reflects light from windows or lamps, enhancing the room’s overall brightness and ambiance.
- Bathrooms: Bathrooms are another ideal location for a wrought iron mirror, especially above the vanity. The durable nature of wrought iron makes it suitable for humid environments, and the mirror can add a touch of luxury to your bathroom decor. Consider pairing it with matching wrought iron fixtures for a cohesive look.
- Bedrooms: A large wrought iron mirror in the bedroom can create a sense of depth and sophistication. Place it above a dresser or lean it against a wall to add both functionality and style. The mirror can also reflect natural light, making the room feel more spacious and airy.
- Hallways: Narrow hallways can benefit from the addition of a wrought iron mirror, as it can make the space feel less confined. Consider hanging the mirror at eye level to create the illusion of width and depth, making the hallway appear larger.
Mounting the Mirror Securely
Mounting a heavy wrought iron mirror requires careful consideration to ensure it is securely attached to the wall. Here are some tips for safely mounting your mirror:
- Choose the Right Hardware: Depending on the weight of the mirror and the type of wall, select appropriate mounting hardware. For drywall, use heavy-duty anchors or toggle bolts that can support the mirror’s weight. For brick or concrete walls, masonry anchors and screws are necessary. If possible, mount the mirror into wall studs for added security.
- Measure and Mark: Before drilling, measure the desired height and position of the mirror. Mark the spots where the mounting hardware will be installed. Use a level to ensure the mirror will hang straight.
- Install the Hardware: Drill holes at the marked spots and insert the chosen anchors or screws. Make sure the hardware is securely fastened to the wall, as this will bear the weight of the mirror.
- Hang the Mirror: With the help of another person, carefully lift the mirror and align it with the mounting hardware. If the mirror has a hanging wire, drape it over the screws or hooks. If it uses brackets, slide the mirror into place until it is securely attached.
- Double-Check Stability: Once the mirror is hung, check its stability by gently pressing on the edges. Ensure that it is securely mounted and does not wobble or shift. If necessary, tighten the hardware or adjust the mounting points.
By carefully selecting the right location and securely mounting your wrought iron mirror, you’ll ensure that it not only enhances the beauty of your space but also remains safely in place. Whether in an entryway, living room, or bathroom, your handcrafted mirror will serve as both a functional and decorative piece that adds timeless charm to your home.
Conclusion
Creating a wrought iron mirror frame is a rewarding project that combines craftsmanship, creativity, and functionality. Let’s recap the key steps involved in the process:
- Designing the Frame: Start by choosing a design that fits your space, whether it’s classic, modern, or rustic. Sketch your ideas and plan the dimensions to ensure the frame complements your mirror and room.
- Gathering Materials and Tools: Collect all necessary materials, including wrought iron bars, a mirror, and welding equipment. Ensure you have the right tools, such as a welding machine, hammer, and safety gear, to work efficiently and safely.
- Crafting the Frame: Cut and shape the wrought iron according to your design. Weld the pieces together to form a sturdy frame, paying attention to alignment and stability. Finish the frame by sanding and applying a protective coating if desired.
- Assembling the Mirror: Carefully fit the mirror into the frame using adhesive or brackets. Ensure the mirror is securely attached and stable, taking precautions to handle the glass and heavy materials safely.
- Displaying the Mirror: Choose the perfect location to display your mirror, such as an entryway, living room, or bathroom. Mount the mirror securely on the wall using appropriate hardware, and check its stability once it’s in place.
Now that you’ve completed your wrought iron mirror, take pride in your work! We’d love to see the beautiful creations you’ve made. Whether you’ve followed the steps exactly or added your own personal touches, share photos of your finished mirrors and any customizations you made. Feel free to post your photos in the comments or tag us on social media. By sharing your work, you’ll inspire others to take on this creative project and add a unique, handcrafted piece to their home.


